Showing posts with label Home. Show all posts

Saturday, January 1, 2022

2022 Free Printable Calendar

Here is an 8.5 x 11" free printable 2022 calendar.  I keep this one in my office for a quick and handy calendar reference.  I got a thin gold table top frame for it so it looks nice and professional.  Download HERE.  Happy 2022!


Monday, December 21, 2020

2021 Free Printable Calendar

Here is an 8.5 x 11" free printable 2021 calendar.  I keep this one in my office for a quick and handy calendar reference.  I got a thin gold table top frame for it so it looks nice and professional.  Download HERE.  May 2021 be better than 2020!


Tuesday, May 8, 2018

Herb Markers

I wanted a cute way to mark my herbs but didn't want to spend a lot of time or money on the markers!  So, I took a plain wooden popsicle stick, stamped on the letters, and wrote in the groves with a black pen.  I already owned the stamps from a previous project (see HERE), so creating the markers was definitely cheap and easy!

Thursday, July 30, 2015

Shells

We had a fabulous trip to Cape San Blas, Florida this year and came home with lots of beautiful shells!  I wanted to figure out a way to display them so we could be reminded of our great memories from the trip!

I purchased a glass vase at the Dollar Tree.  Using my Silhouette, I cut out "Cape San Blas 2015" (Mister Sirloin font) in blue vinyl.  I placed the vinyl on the vase and filled it with our shells.  Love it!

Tuesday, December 9, 2014

Christmas Wreaths

This year, I made a new Christmas wreath for our house and Christmas wreaths for teacher gifts.  They are a little different but both so cute!

For our house wreath, I used a grapevine wreath with red floral stems, 2 red birds, a JOY sign, and a burlap ribbon bow.  The red floral stems and red birds are attached with hot glue while the JOY sign is tied on the wreath with twine.  I love it!


For the teacher's wreath, I used a grapevine wreath and spray painted it white.  I added shiny red berry stems, shiny red swirls, and a JOY sign that I attached with hot glue.  Then, I added a shiny red ribbon!  To give to the teacher, I added 2" circle pictures of all the kids attached to 2.5" white scallop circles that were secured to the wreath with tiny white clothespins.  I love to give the teacher a gift that has special meaning with the kids' pictures on it but also something that they can really use later by removing the pictures if they want!


Sunday, September 28, 2014

Painter's Tape Artwork

I've been updating my Art Wall (see post) and needed some more art for my 6 year old son.  We decided to make this simple painter's tape artwork for the wall!  It was so easy and turned out great!

I bought a blank canvas and attached blue painter's tape in random patterns across it.  Make sure to press the tape down very well.  Then my son painted each shape with the color of his choice using acrylic paint.  I let it dry completely and then carefully peeled off the painter's tape.  (We only had a problem with a couple of colors getting under the tape and I think these were some older bottles of paint that were a more liquid consistency.  So, watch for that if you are using leftover paint.)  It looks awesome on the art wall!!


Sunday, January 19, 2014

More Bible Verses

We have run through most of the Bible verses from my first post (see HERE), so I wanted to create some new ones for the new year!  I once did a Bible study on the characteristics of God and loved it!  It was Behold Your God by Myrna Alexander and I really started to think about God differently after this study.  So, I made some Bible verses to put in my home that remind me about the wonderful qualities of God listed in the Bible.  You can download them, print them out, cut around the edges, & put in a 5x7" frame.  There are enough for one a month for 2 years.  Enjoy!


Click to download God Verses 1 & 2 - Holy & Love
Click to download God Verses 3 & 4 - Refuge & Generous
Click to download God Verses 5 & 6 - Supreme & Compassionate
Click to download God Verses 7 & 8 - Powerful & Near
Click to download God Verses 9 & 10 - Rock & All-knowing
Click to download God Verses 11 & 12 - Good & Mighty
Click to download God Verses 13 & 14 - Unchanging & Directing
Click to download God Verses 15 & 16 - Faithful & Merciful
Click to download God Verses 17 & 18 - Great & Just
Click to download God Verses 19 & 20 - Forgiving & Everywhere
Click to download God Verses 21 & 22 - Wise & Everlasting
Click to download God Verses 23 & 24 - Strong & With us

Sunday, September 15, 2013

Burlap Wreath

Y'all, burlap wreaths are SO easy to make!  I had no idea!  There are instructions all over the internet, but it's pretty easy to just figure it out as you go.  I bought a 20" wire wreath frame.  I debated what size to get and finally decided on the bigger one but would have been fine with the next size down as the burlap ribbon really fills it out.  I ended up using 5 30 foot burlap ribbon rolls.  I didn't know it would take so much ribbon and had to go back for more - definitely get your ribbon when it's 40% off at Hobby Lobby or Michaels!  To make the wreath, secure the loose end with a pipe cleaner and just start stuffing loops of ribbon (about the size of a coke can)  in between the wire frames, working vertically through each frame space.  Compress it together as you go so that the wreath will be nice and full.  When needed, secure loose ends with pipe cleaner.  Keep going until you get all the way around the frame!  For this wreath, I used orange burlap ribbon with plans to have an Auburn wreath that I could turn into a Halloween wreath for October.  For the Auburn wreath, I bought navy ribbon and an Auburn plaque for the middle.  For the Halloween wreath, I bought black glittery ribbon, a spider for the middle, and a small Halloween plaque.  Here is how the Auburn one turned out: (love!)


And here is the Halloween one:

Wednesday, April 3, 2013

Art Wall

So, with 2 kids, I have art work coming out my ears!!  Not only is my 8 year old doing the usual school art class, but he also does an after school art class that generates lots of nice, frame-worthy art!  I decided I needed a place to put it all!  Also, I wanted to be able to change out all of the art work as both boys bring home different masterpieces over the years.

I was able to get 3 frames from the school art fair that are matted and easy to change out on the back.  I also got 4 ready made frames from Hobby Lobby.  For an extra $2 a frame, they screwed the canvas art work in place, which I can simply change out with a screwdriver.  I also got a couple of shadow boxes and had a couple of extra frames that I added fabric to and mini clothespins to attach the art work.  (I cut the fabric to fit the glass or backing and used spray adhesive to attach the fabric.  I painted the mini clothespins to match the fabric and glued them to the fabric using E6000 glue.)  I used all black frames for some continuity.  I also got and painted 3 wooden letters from Hobby Lobby to spell out "A-R-T".  Then, I had to lay it all out and figure out what art would go where.  My hubby hung it all on the wall and here is how it turned out.  I am in LOVE with it!

Thursday, January 10, 2013

Wreaths

This past year, I've used one standard wreath idea and adapted it for each season.  I buy a grapevine wreath at Michael's (using the 40% off coupon) then add season-appropriate embellishments and a matching satin ribbon.  Cute and very easy!  I either poke the embellishments into the wreath or hot glue them on.  I use twine that matches my door color to tie on the center embellishments so that they won't bang against the door.


All-purpose Wreath: White initial, white/cream flowers, cream ribbon


Easter Wreath: Pastel cross, pink hydrangea, strand of small pink buds, pink ruffle ribbon


Summer Wreath: Green tin initial, magnolias, & green satin ribbon


Fall Wreath: Brown metal initial, autumn floral picks, orange satin ribbon
Winter Wreath: Distressed numbers, light blue & red floral picks, nest with eggs, & light blue satin ribbon

Sunday, September 2, 2012

Room Redo

I decided to redo my boys' bedrooms and the playroom all at the same time! (smart huh?)  I'm not sure what got into me but it's done!

My 8 year old's room is outdoor themed with the main colors of green & navy.  The bedding came from Pottery Barn Kids.  The green limb throw pillows came from Land of Nod.  The big joe bean bag chair came from Walmart.


I found a plain navy valance & lamp shade and glued on the burlap & green ribbons.


I made the bulletin board by painting the edges navy, using spray adhesive to attach the navy fabric, & using glue to attach the ribbon border.


His bathroom is white & navy.


I made this blue and white chevron painting for the bathroom.  I painted the canvas navy.  Then I traced the chevron pattern from a Silhouette cut out and painted in the white.  I'm happy with it but it sure was a pain - 6 coats of white!


My almost 5 year old's room is sports themed with the main colors of navy, red, & light blue.  I got the bedding at Pottery Barn Kids.  Most of the sports decor and pictures came from Hobby Lobby.

Pottery Barn Kids had this curtain that was perfect but it only came in a panel and I needed a valance.  So, I went ahead and bought the panel and cut it off and hemmed it with iron on hem tape.  I used the extra fabric to make a bulletin board, 2 lamp shades, & a throw pillow.

I made the bulletin board the same way as before: painted edges red, used spray adhesive to attach fabric, & used glue to attach ribbon border.

I made these 2 throw pillows - one with the extra curtain fabric & one with an old baseball jersey.  I cannot sew so I used iron on hem tape to make them both.  I cut the 2 squares of fabric to fit the pillow form with a couple of extra inches at the top and sides and with several extra inches at the bottom.  Lay the 2 squares with the outside in and iron on hem tape at the top and sides.  Let cool.  Turn the pillow case inside out and insert the pillow form.  If needed, cut off excess fabric at the bottom.  The bottom is the hardest part and definitely the part you don't want others to see as it just won't be as clean as the other 3 sides.  Fold the bottom fabric together and iron on the hem tape. 

I made the 2 lamp shades with the same fabric.  You can buy the self adhesive lamp shades at Hobby Lobby or online at Hollywood Lights.  Just follow their directions!


I made these pictures by painting 4 12x12 inch canvases white, red, navy, & light blue.  Then I used my Silhouette Cameo to cut the sports balls in different colors of vinyl and adhered them to the canvases.

This is his bathroom.


The playroom is Auburn themed with the main colors of navy & orange.  I got the adorable burlap pillows on Etsy, the orange ottoman cubes at Target, the standing lamp at Walmart, and the curtain panels at Walmart.

I decorated this dry erase board by gluing on the tiger ribbon.  I also made new decoupage orange and blue clothespins for the playroom.


I already had this metal tile.  I painted the middle navy and added the orange vinyl AU using my Silhouette Cameo.


I just "had" to make this frame Auburn-y too, so I removed the glass and splatter painted orange and blue acrylic paint on it.


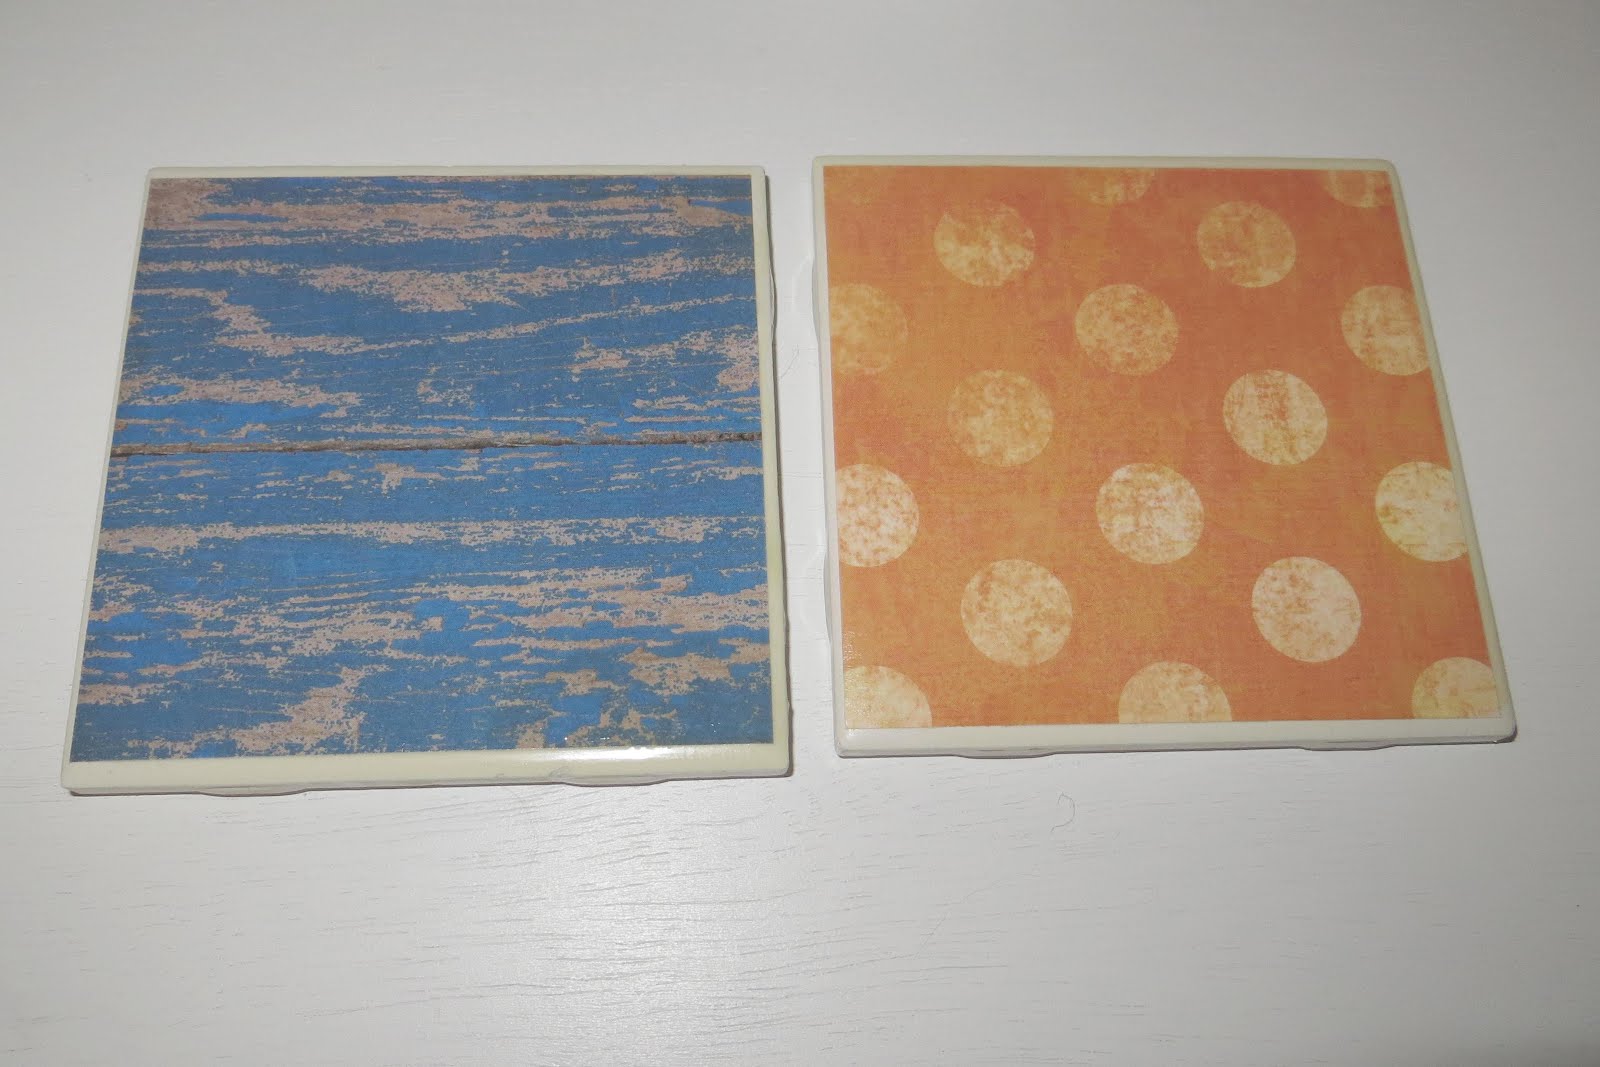
I made these orange & blue coasters for the playroom too.  Simply purchase cheap white individual tiles at a home store.  Cut scrapbook paper to fit the tiles (my pieces were 4x4 inch).  Use a paintbrush to paint Mod Podge on the tile and on the back of the scrapbook paper.  Put scrapbook paper on top of tile and let dry.  Paint a coat of Mod Podge over the top of scrapbook paper.  Let dry.  Since I thought these might be getting real wet, I added a coat of polyurethane too.


I'm so happy with how it all turned out!  I have a tendency to go overboard with a theme so I made an effort this time to concentrate more on the colors so that I would be able to redo the theme of the room without having to redo the whole room in the future.  I also liked having the one common color of navy.  I decided to get navy bean bag chairs so that I can move them to any room and the colors would work.  My boys love their new rooms!

Tuesday, July 3, 2012

Bible Verses to Print & Memorize

Our Sunday School class has been doing a study on parenting.  One of the biggest things that I have taken from this study is that I need to be doing a better job of teaching my children scripture.  So, I decided we would start memorizing one Bible verse each week.  Each week, I print a verse on white cardstock and put it in a 5x7 picture frame.  We review the Bible verse together as a family either at dinner or bedtime.  I am excited for all of us to learn the important Word of God!  After we finish with the verse, I punch a hole in it and put it on a binder ring so we can continue to review the verses we've learned.


Here are the verses:  Enough for a whole year, including some special holiday verses!
Here is the link to all RoomMomExtra documents on Scribd.  Or,

Click to download Bible Verses 1 & 2
Click to download Bible Verses 3 & 4
Click to download Bible Verses 5 & 6
Click to download Bible Verses 7 & 8
Click to download Bible Verses 9 & 10
Click to download Bible Verses 11 & 12
Click to download Bible Verses 13 & 14
Click to download Bible Verses 15 & 16
Click to download Bible Verses 17 & 18
Click to download Bible Verses 19 & 20
Click to download Bible Verses 21 & 22
Click to download Bible Verses 23 & 24
Click to download Bible Verses 25 & 26
Click to download Bible Verses 27 & 28
Click to download Bible Verses 29 & 30
Click to download Bible Verses 31 & 32
Click to download Bible Verses 33 & 34
Click to download Bible Verses 35 & 36
Click to download Bible Verses 37 & 38
Click to download Bible Verses 39 & 40
Click to download Bible Verses - Valentines
Click to download Bible Verses - Easter
Click to download Bible Verses - Patriotic
Click to download Bible Verses - Thanksgiving
Click to download Bible Verses - Christmas 1
Click to download Bible Verses - Christmas 2